How to Configure Email Templates
DSAR requests are enabled by the exchange of emails between yourself and your clients. It is through emails that clients can send in their requests, ask for information, verify information etc. It also via emails that you verify requests, validate requests, keep clients informed and such. Data Governance Tool not only enables you to configure emails for every possible Event Type, it also provides the ability to schedule automated reminder emails as per your requirements and utilize pre-drafted templates.
Log in to the Data Governance Tool

Once logged in, the Main Screen of Data Governance Tool will be displayed
Click on the Settings icon on the top right corner of the Main Screen

On clicking the Settings icon, a drop-down menu will be displayed
Select the option, Configure Email from the drop-down menu

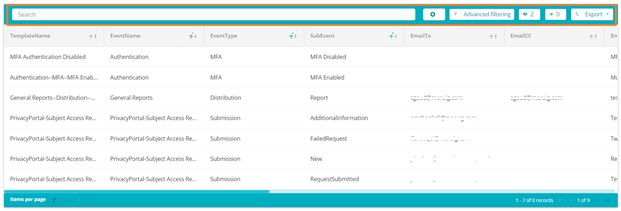
The Email Configuration Page will display already existing email templates, as well as the option to search, create new templates, filter templates and export.

To create a new template, click on the Add button located to the right of the ‘Search Bar’

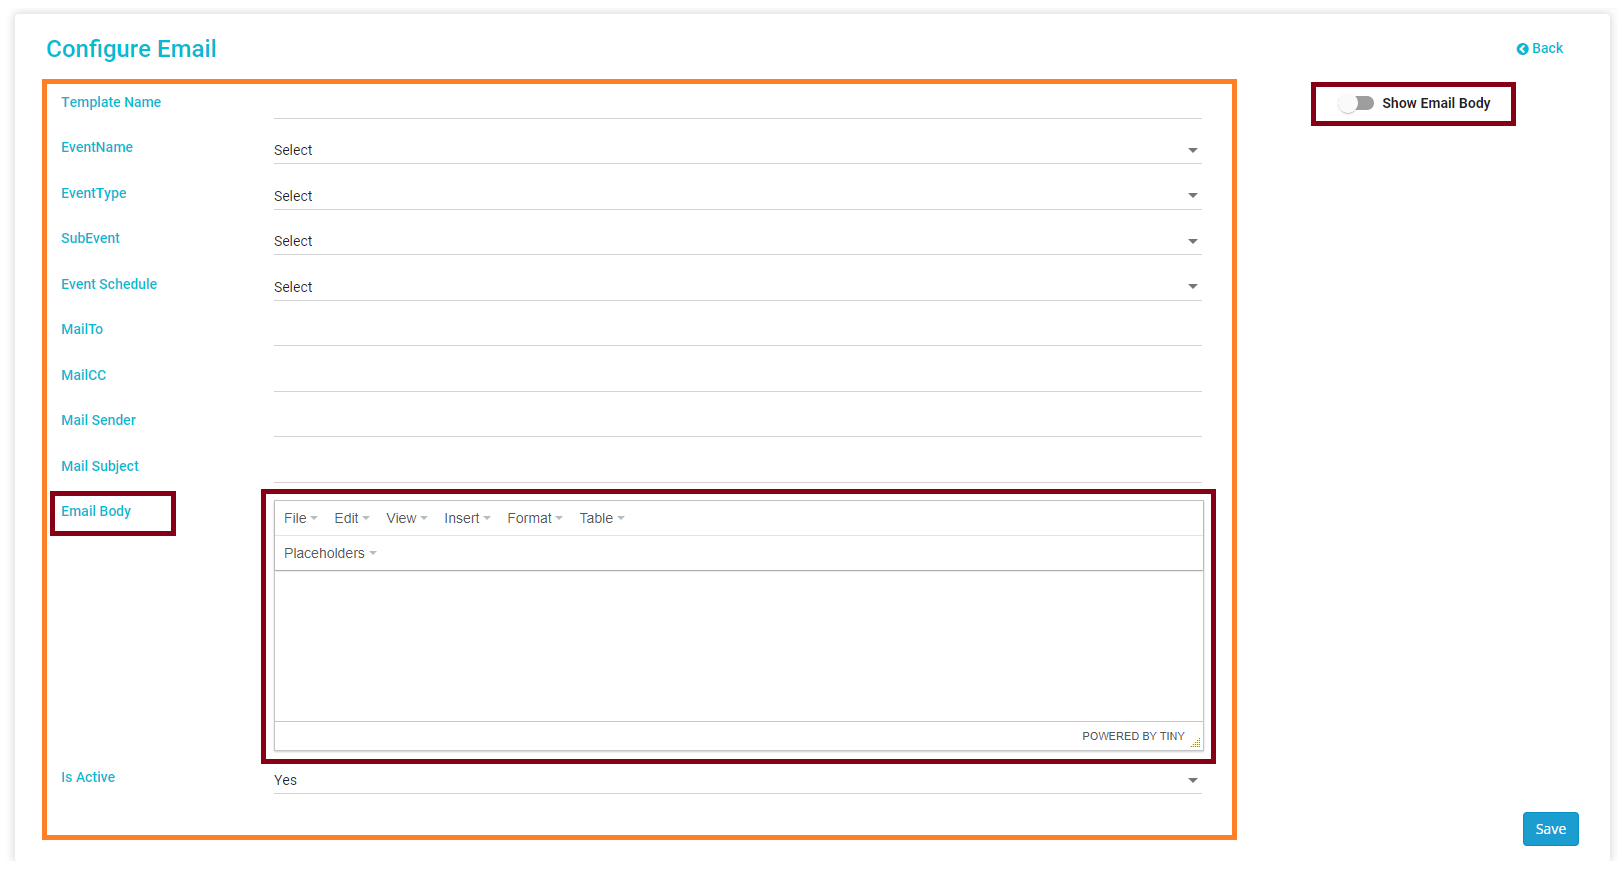
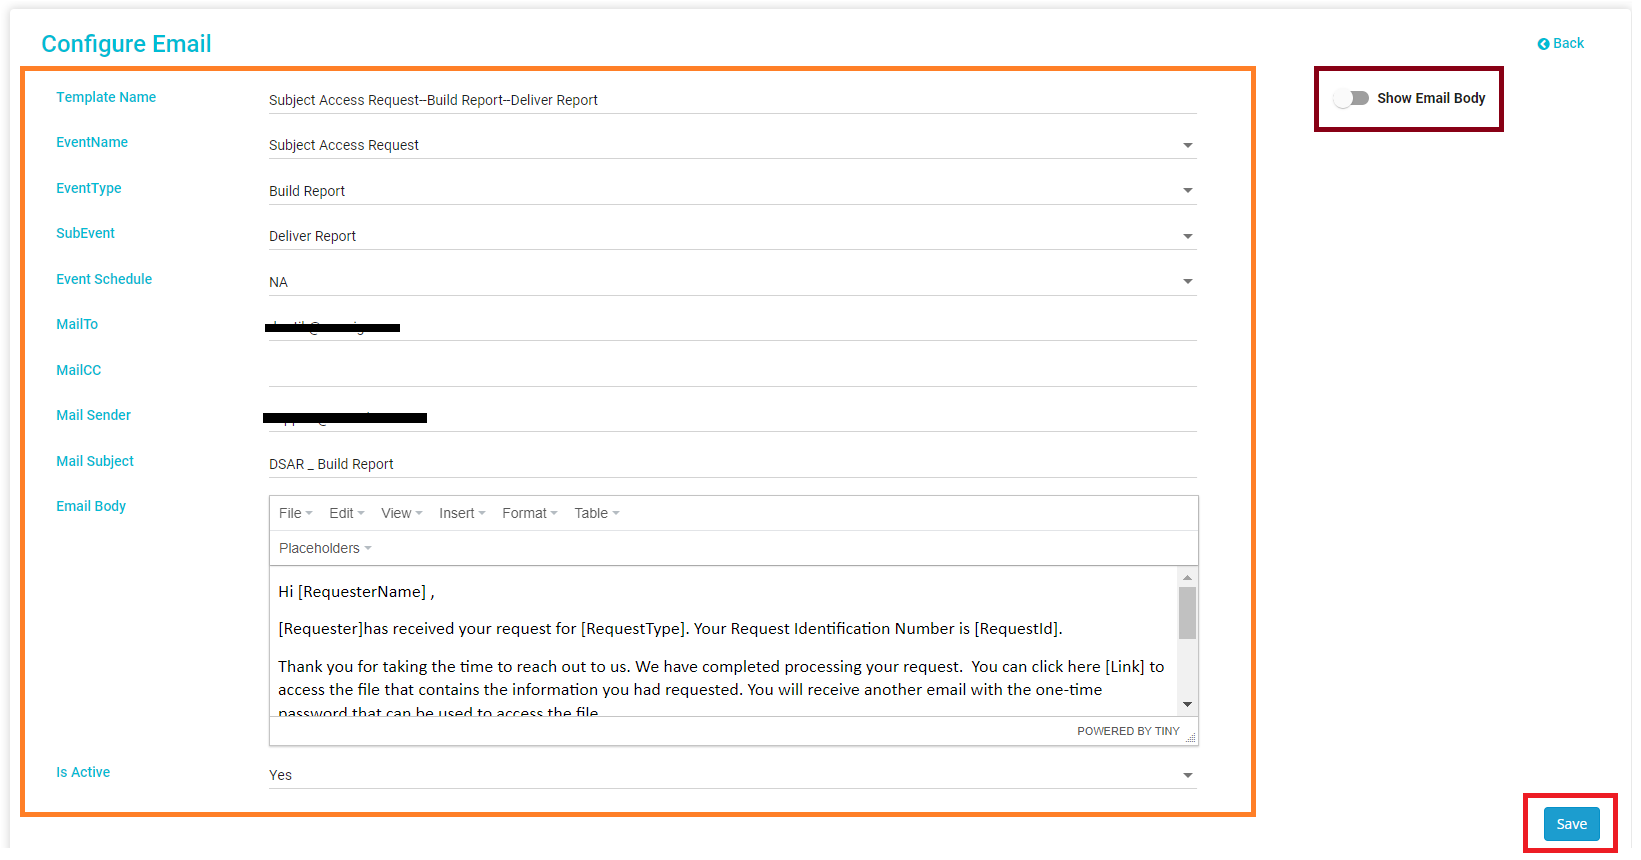
The Email configuration page displays multiple fields :

Email Template Field Description
| Title | Description |
|---|---|
| Template Name | You can title the email template when creating/editing it |
| EventName | Refers to the type of event or activity this email template will be integrated to, e.g., Authentication / Subject Access Request (DSAR) / Survey, etc. |
| EventType | This is the subcategory of "Event Name". Based on the EventName you have selected, the EventType will need to be selected from the predefined dropdown. For example, if you have selected "Subject Access Request" under EventName, then the EventType dropdown will display Acknowledge / Agent / Build Report / Closed, etc. |
| SubEvent | This is the subcategory of "EventType". Based on the EventType you have selected, the SubEvent will need to be selected from the predefined dropdown. For example, if you have selected the EventName as "Subject Access Request" and the Event type as "Acknowledge" then the SubEvent dropdown will display Accept the request / Close Request / Complete the request, etc. |
| Event Schedule | Here you can schedule the frequency with which the email will go out, i.e., Daily / Hourly / Monthly / NA (No Action: select NA to keep Event Schedule blank/invalid) / Weekly, etc |
| MailTo | Here you can enter the email address/es of users to whom this email will be sent should the template be selected for a workflow. The field can be left blank if required. |
| MailCC | Here you can enter the email address/es of users who will be marked in the CC of the email should the template be selected for a workflow. The field can be left blank if required. |
| Mail Sender | This field is where the sender’s email address is mentioned |
| Mail Subject | This field is to define the Email subject |
| Email Body | Here you can enter the content of your email. This can be defined either in text or HTML code |
| Is Active | This option will define whether the configured email template is active or not. E.g., if it is set to Yes, then the template will be Active, if it is set to No, then the template will be Inactive |
Note : The below fields are enabled only for certain options under EventName / EventType / SubEvent
| Title | Description |
|---|---|
| Report | This field lists the various Reports available. Based on the requirement you can select one or more (Check Boxes) reports to add to your template |
| Additional Information | This field provides multiple Additional Information choices (Check Boxes) such as first name, username, address. Based on the requirement, you can select one or more to add to your template |
| Reminder In | Here you can specify the number of the days in which the remainder email will be sent. For example, if you mention 2 in the field, then a reminder will be sent in 2 days from the date of the initial email |
Note : To learn more about email configuration fields in detail, see Email Template Field details
Once all the required information has been filed in, click the Save button at the bottom right corner of the page.
